Summer is coming and with summer comes ice cream. We have a few grandpas
in our family that love ice cream so much, that they don't bother with
silly things like bowls. However, this poses the problem of the freezing fingers
because you can't hold the carton very long before your hand is a popsicle.
You could wrap the carton with a kitchen towel or you could get fancy
and use an ice cream cozy. There are cozies for Starbucks and soda pop,
so why not an ice cream cozy!

ICE CREAM COZY SUPPLIES:
- two coordinating pieces of fabric cut to 17.5″x5″
- 2 pieces of elastic (I used new ponytail holders)
- double sided iron on adhesive
- one piece of felt or fleece cut to 17″x4.5″
- buttons
- scrap of coordinating fabric (for initial)
Cut your coordinating pieces of fabric to 17.5″x5″. This size fit my ice cream container
perfectly. For sizing to your container you’ll need to measure from the bottom
of the lid to the bottom of the container and then add in for seam allowances.
STEP TWO
Following the package directions, cut your double sided iron on adhesive
to about 1/2″ smaller than your fabric and adhere to the WRONG SIDE
of the fabric that you want on the outside of your cozy.
Then remove the paper and adhere the piece of felt or fleece to the iron on adhesive.
This will give you extra insulation against the cold container.
STEP THREE
Pin wrong sides together. Then, on one end, slip in your two pieces of elastic
and leave the extra hanging out. Then, stitch around three sides of your rectangle
with a 1/4″ seam, leaving the short side opposite the elastic pieces open for turning.
Clip the corners.
STEP FOUR
Turn your cozy right side out and push out your corners.
Fold your open side in a 1/4″, iron to make it crisp,
and then top stitch all the way around your ice cream cozy.
Turn your cozy right side out and push out your corners.
Fold your open side in a 1/4″, iron to make it crisp,
and then top stitch all the way around your ice cream cozy.
STEP FIVE
Put your cozy around your ice cream container and make marks
where you’d like you buttons to be. Also, mark where you’d like your initial to be.
I wanted my directly opposite of the of the buttons,
so I marked where I wanted to sit with a pin.
Put your cozy around your ice cream container and make marks
where you’d like you buttons to be. Also, mark where you’d like your initial to be.
I wanted my directly opposite of the of the buttons,
so I marked where I wanted to sit with a pin.
STEP SIX
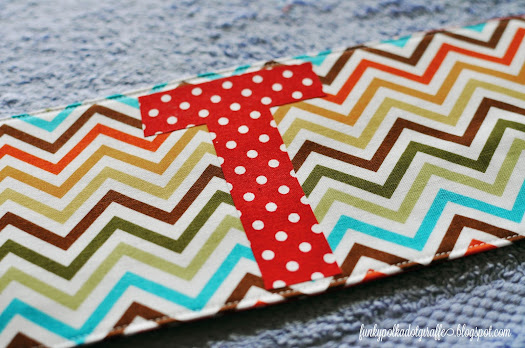
Trace the initial you’d like on your cozy
to the paper side of the iron-on adhesive
and follow the package
directions for adhering it to the WRONG SIDE of your fabric.
This means,
that your alphabet letter will need to be flipped so that when you cut
it out,
you have it the right way. Remove the paper and iron your letter
onto the spot
you previously marked and then sew around it.
STEP SEVEN
Finally, sew the buttons onto the two spots you marked and then put it on your ice cream container and get to eating! If you're making it
for someone else, you can leave it in the freezer for them to find!
Is there someone in your house that would love this? You could also
make a smaller version to fit the personal pints of ice cream.
Oh, the possibilities!
make a smaller version to fit the personal pints of ice cream.
Oh, the possibilities!


1 comments:
you are a genius!
Post a Comment