

It's the Surfer's Poncho -
or a new spin on the classic and much loved, hooded towel.

We have swimming lessons again next week and one thing that drives me crazy is
the dragging of the towels across the parking lot
or the crying 2 year old because she can't keep her towel on and she's "freezing".
The insanity!!!!
So I was brainstorming with my husband about
the problem - he's a good sounding board -
and he said, "You should make a surfer's towel."
And I was like, huh?
He explained that surfers cut holes in the top
of a towel so they have a makeshift changing room on the beach.
The towels don't fall off - because they are poncho style.
So I changed the plans a little bit and this is what I came up with.
What you'll need:
1 large towel
1 hand towel
thread
sewing machine
STEP ONE
Fold your hand towel in half.
You can use the decorative edge or a finished edge of the
towel to save you the time of having to "hem" the outside edge.
Lay your pattern down and pin.
I used a hood from a hooded towel we already had to make my pattern.
You can use the decorative edge or a finished edge of the
towel to save you the time of having to "hem" the outside edge.
Lay your pattern down and pin.
I used a hood from a hooded towel we already had to make my pattern.

STEP TWO
Cut your hood pieces out, cutting a little extra for seam allowance
if you didn't already allow for that in the sizing.
I added extra, because the pattern was actually for my
daughter's towel and my son has a BIG-ger head :)

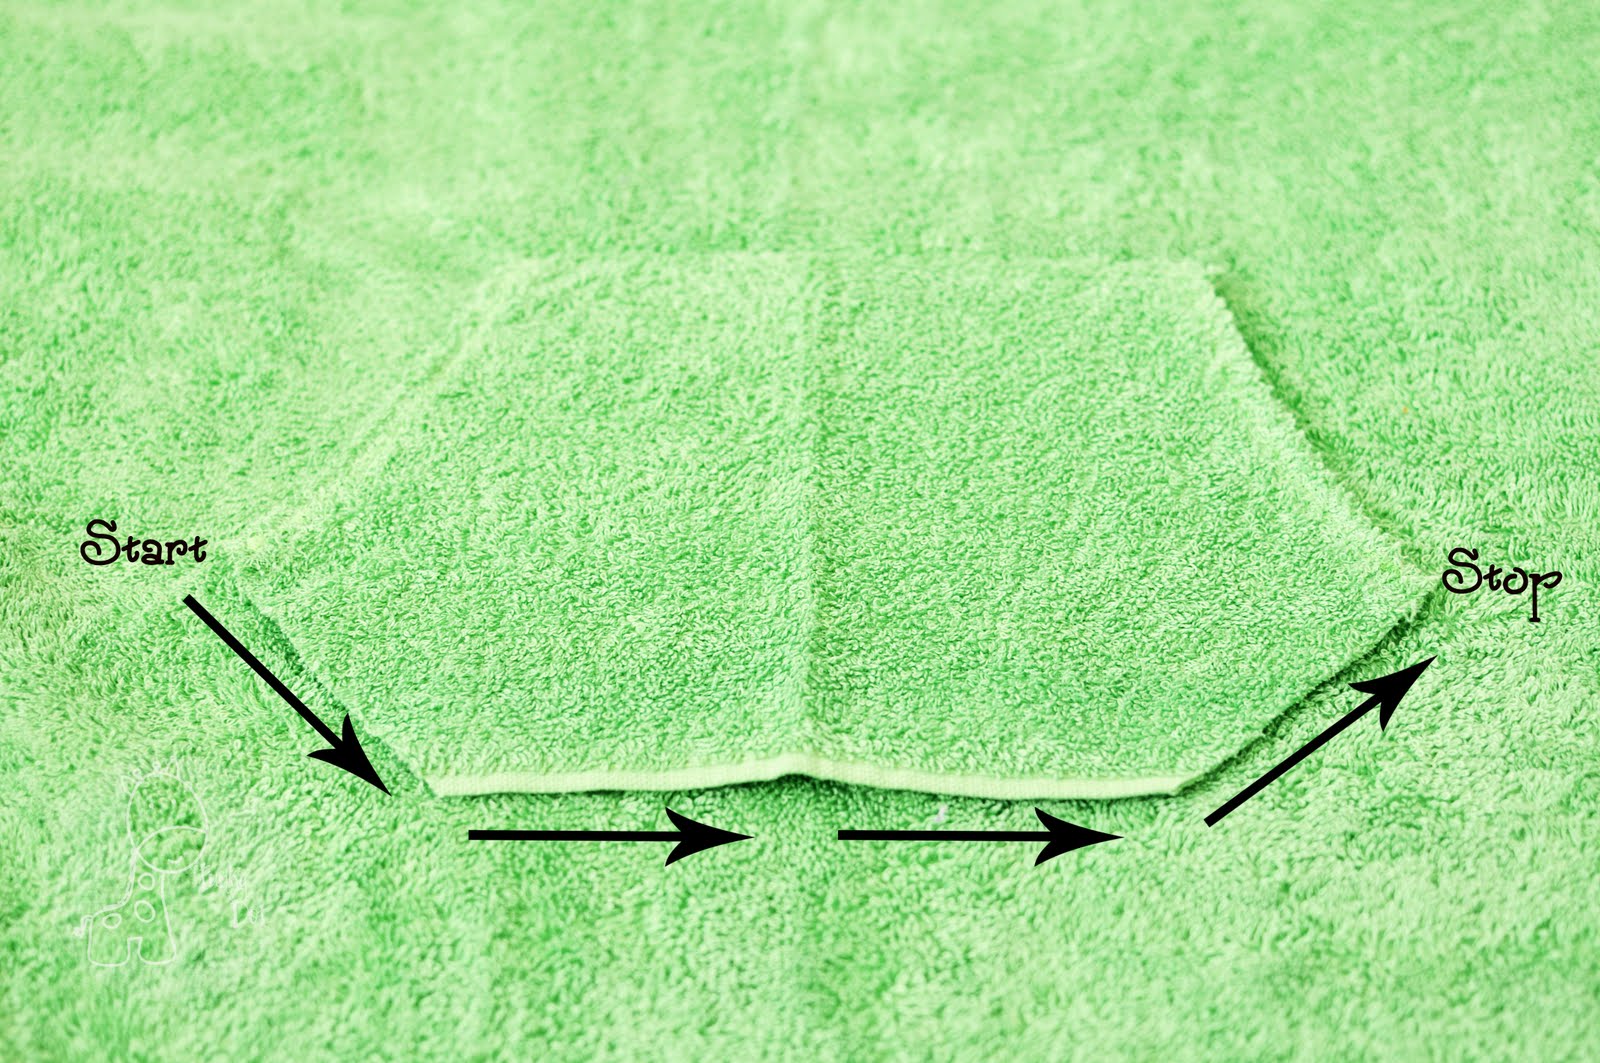
STEP THREE
Sew around the outside edge where the arrows outline.
I sewed a 1/4" seam allowance with a zig zag stitch
and then went over the seam again with a straight stitch.

STEP FOUR
Fold your towel in half to form the poncho.
Then, find the center of the folded edge.
You could measure and be exact, but I folded it in half again
and marked with a pin.

STEP FIVE
Use the neck hole of a shirt and make a pattern
piece for the neck opening.
You can also estimate and eye it if you're comfortable with that.


STEP SIX
Open up your neck opening and pin down the front
half of the ellipse.
Then sew a 1/4" seam around the pinned edge -
again I did a zig zag and then a straight stitch.


STEP SEVEN
Find the center of the back part of the ellipse and mark with a pin.
Then match the center of the hood to the center of the ellipse
and pin the hood to the poncho right sides together.


STEP EIGHT
Sew the hood to the poncho with a 1/4" seam.
I did a zig zag and went back over with a straight stitch.
Woohoo! Now you have a Surfer Poncho!

STEP NINE
Time to add the pocket.
I grabbed my son's sweatshirt and took a pattern from the pocket.

STEP TEN
Cut a little extra for seam allowances, then fold the edges
under where the arrows are and sew down the raw edge
so you have a finished edge.

STEP ELEVEN
Position in the pocket where you'd like it to lay.
Then, holding the top edge of the pocket in place,
flip the pocket up toward the hood,
so that with right sides are together now.
Sew with a 1/4" seam along the top seam -
that looks like the bottom seam of the pocket right now.

STEP TWELVE
After you've sewn the top seam,
flip it back down and sew the bottom portion down,
leave the holes open for the pocket.
And there you have it - The Surfer's Poncho!

And just in case you have a Surfette :)


8 comments:
Awesome. I love this. Perfect for wrapping up the little ones.
2 please! :)
This is AWESOMENESS!!!
Year Old Birthday Party Ideas
Hahaha, that is so awesome! I can just imagine some white felt triangles on the hood of the green one... they could the teeth of a big scary dinosaur!! Awesome, I love it!! Antonia
I am going to start calling you MacGyver! These towel wraps are awesome and of course your kids are precious.
Wow these are amazing. The actually look doable! I am a terrible seamstress.
Thanks!
Happy little feet
Good morning! I found this on Pinterest over the weekend and just made one for my son. This was only my second sewing project and it was so easy and I managed to actually do it! Thank you for the simple and easy to follow instructions!
Good morning! I found this on Pinterest this past weekend and just finished it making it for my son! It is only my second sewing project after learning how to use a sewing machine. That should be an indication on how well the instructions were conveyed and how simple this project is. Thanks a bunch!
Post a Comment