

Back after Isabella was too big for her infant car seat carrier,
I started making car seat canopies for my (now non-existent) Etsy shop
and for local handmade boutique shows that I did with a friend.
I always kicked myself that I started making them after my babies needed them,
and I vowed that if I ever had another baby, I would have a fancy car seat canopy!
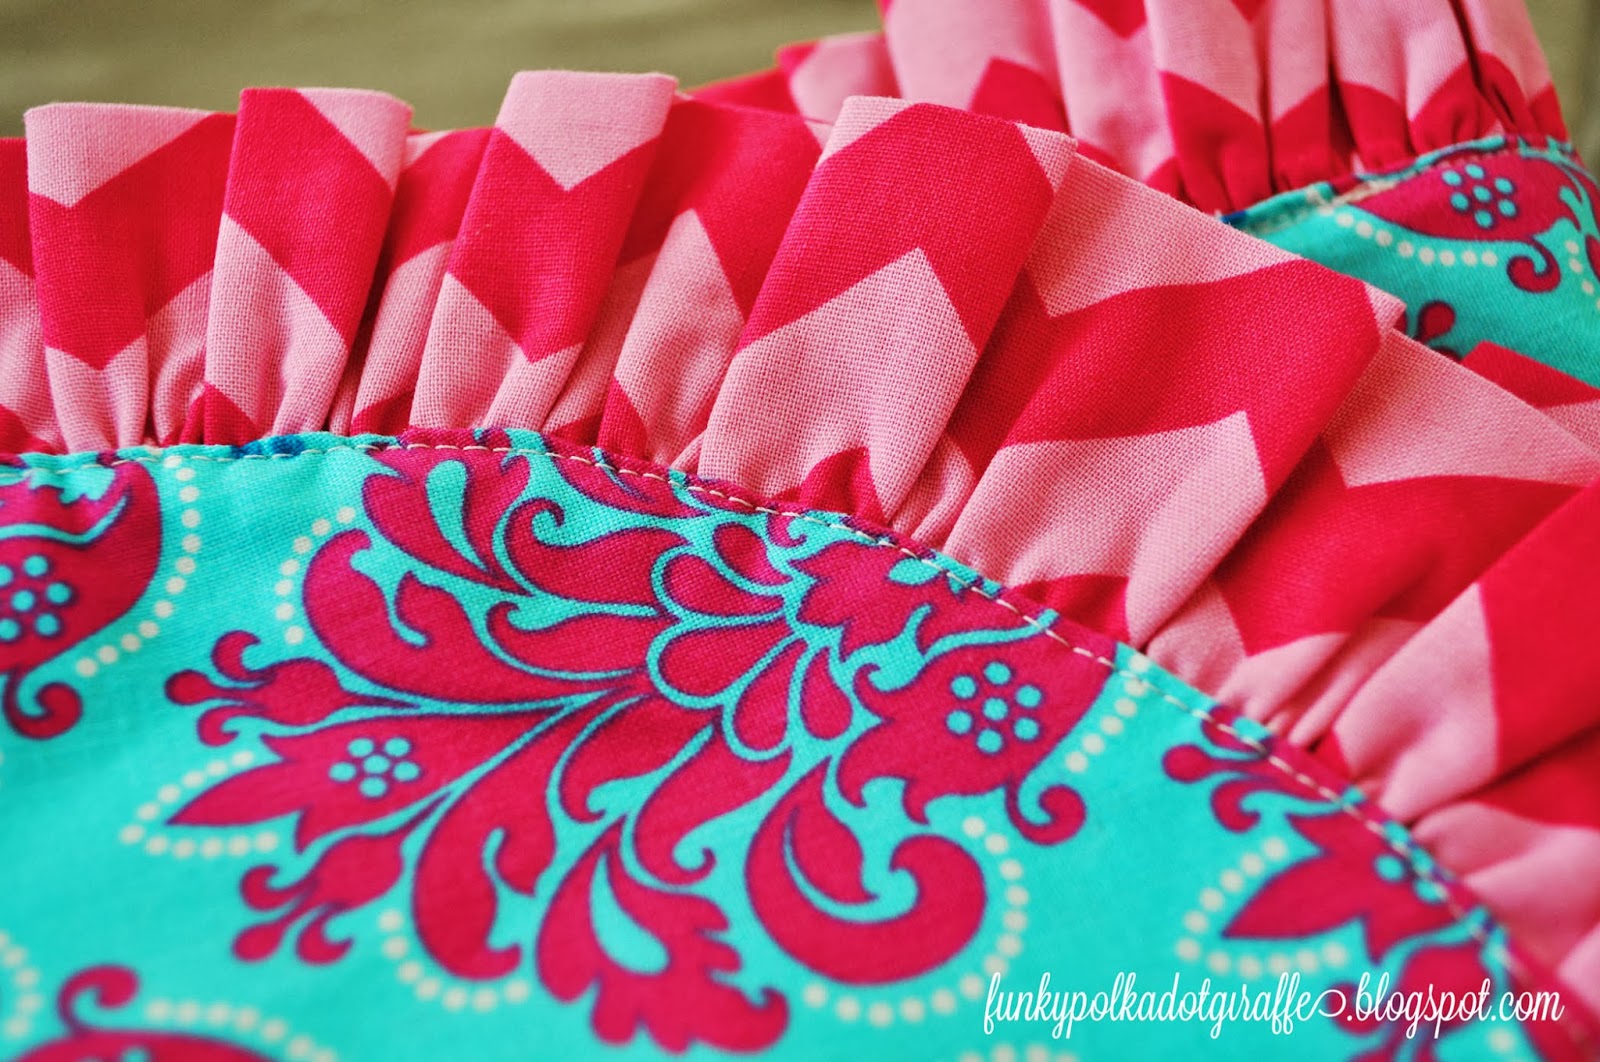
So here's my tutorial for making your own car seat canopy with a darling ruffled edge.
If you're having a boy or don't want to bother with a ruffle, then this project is about
100% easier to complete. But since everything is better with ruffles, I had to
make mine with a ruffly edge.
Disclaimer: This is a picture heavy post. When I use a sewing tutorial,
I like there to be a lot of pictures that show most of the steps.
Sorry if you're not visual like I am!
Also, I do all my cutting at once, so that I don't have to come back and forth
from my machine to my cutting mat.
You'll need:
*1 yd + 4 inches of your top fabric
* 1 yd + 28 inches of your bottom/ruffle fabric
* 2 - 2 inch pieces of sew on Velcro
* coordinating thread
* rotary cutter or scissors
STEP ONE
Cut 1 yd of both your top and bottom fabrics - put aside your extra fabric of each for later.
If your directional design (like both of mine did), then you will need 45" of both fabric,
plus the extra lengths given above. Usually I try to stay away from directional designs,
but this time they were just too cute not to use. So I cut 45" of both and then trimmed
the other side (width) down to 36". You want to end up with 2 pieces that are about 36"x45".

STEP TWO
Grab a dinner plate and round each of your four corners.
I pin the corner (under the plate), trace the plate, cut, and pin down the side until
I get to the next corner that needs to be rounded.


STEP THREE
Using the 4" piece of the top fabric, cut it into two pieces that are 4"x17".
These will be your straps.
Fold in half, with right sides together, and iron flat.

STEP FOUR
Time to cut your ruffles!
Take the 28" piece of your bottom fabric and cut it into 7 pieces that are 4" wide from
selvege to selvege.

TIME TO SEW!!!!!!!
STEP FIVE
Grab the two 4"x17" pieces that will be your straps and sew around with a 1/4"
seam allowance, leaving a small hole on one of the long sides for turning.
Clip the corners. Turn right side out. Iron. Top stitch all the way around.


STEP SIX
Grab your two pieces of velcro and sew them to your straps.
I just eyeball the position.
Be sure that your fuzzy side and your hook side of your velcro are sewn
onto the opposite sides of each strap.
Straps are done!

STEP SEVEN
Take the seven 4"x45" pieces of the ruffle fabric and sew the short sides together until you
have a big long tube of fabric. Fold in half and iron the wrong sides together so that the seams
are hidden inside your tube of fabric.
Gather the fabric into a big pile of ruffles!
I set my machine to the high tension and increase my stitch length to the longest setting.
Then I stitch about a 1/4" from the edge
AT EVERY SEAM STOP, DON'T BACKSTITCH, CUT THE THREADS LONG,
AND THEN START SEWING AGAIN ON THE OTHER SIDE OF THE SEAM.
(I did not do this and I was kicking myself as I started to gather!)
Pull the top thread of each length to gather until you have the right length
for your car seat canopy.


STEP EIGHT
Once you have it all gathered to the right length, then sandwich the ruffles
in between the two 36"x45".
Be sure that the raw edge of the ruffle is on the outside with the raw edge of
the top and bottom fabrics, and the pretty edge is pointing in toward
the inside of the giant rectangle - PINNING AND PINNING SOME MORE!
(I can't believe I didn't take a picture of the ruffle sandwich!)
Then, start sewing around the edge with a 3/8"-1/2" seam allowance.
BE SURE TO LEAVE A HOLE FOR TURNING ON ONE OF THE LONG SIDES.
Turn right sides out, iron, and then top stitch around the entire edge,
which will close up your hole for turning at the same time!
TIME TO PUT IT ALL TOGETHER!!!!
STEP NINE
Now we're going to attach the straps.
With your top fabric facing out toward you, fold it in half length wise,
and then fold it half again width wise.
At the little point you create, mark with a pin.

Unfold the fabric, and using a ruler, mark 3 inches away from the pin the you placed in the center
of your giant rectangle.
Your strap piece should run the same direction as the long length (45") of your rectangle.
Fold your handle piece in half, and place the half crease (center) 3" away from the
center pin that you marked earlier.
Using two short pins, pin your handle with a pin cross formation.

Repeat with the 2nd strap piece.


Stitch a square around your cross formation pins and make an "X" in the middle
for extra security.

YOU'RE DONE!!!!!!
 |
If the canopy is for a girl (like this one is) I had a bow detail to the top of the strap.
This time I made cute little fabric bows and glued them to the strap.
I've also made ribbon bows before too.
I've seen them finished with a button when they are for a boy,
which is also super cute!

I am in love with how it turned out and love the chevron on the inside.
You could even add in a third coordinating fabric for the ruffle if you wanted to.

But I loved the chevron too much not to let it show on the outside just a little bit!

It's such a fun baby shower gift to give, especially since you can personalize it
with fabrics that you know the mom-to-be will love.
I saw you can now buy car seat canopies at Target even, but they won't
be as personalized as if you choose the fabrics yourself!
Plus, none of them had a rad ruffled edge and a bow accent on the strap!

Good luck!
And if you use the tutorial to make yourself one, I'd love it if you uploaded
the photo to the Funky PolkaDot Giraffe Flickr Page!

Fine Print:
Please feel free to use this tutorial/print for your personal use.
Please feel free to use this tutorial/print for your personal use.
Please be kind
and give credit where credit is due.
Any questions or comments please
do not hesitate to contact me.


2 comments:
Iv'e seen many carseat canopy covers & I absolutely love this one! From the ruffles, to the bow accents to the prints you used! Do you mind me asking where it is you got your fabric from? I love those prints!! TIA :)
Post a Comment