FUNKY POLKADOT GIRAFFE
Showing posts with label Joann. Show all posts

Monday, December 23, 2013

Fabulously Festive Holiday Sparkle Hair Bows #fabulouslyfestive

Disclosure: This post is brought to you by Jo-Ann Fabric and Craft Stores. I was given a gift card to facilitate making a #fabulouslyfestive craft.

I {adore} any excuse to make hair bows for my little Isabella.
Recently we went to Disneyland and I whipped up a cute Elsa inspired outfit
for her to wear and she definitely needed some sparkly hair bows to make the
outfit just a little bit more festive and fun.

So, I made her some gift bow hair clips out of sparkly ribbon and I'm sharing
a little tutorial with you. These would be perfect for jazzing up your little one's
hair for the upcoming new ball drop!


STEP ONE
Cut nine pieces of sparkly ribbon (I used 3/8") in the following lengths:
 3 pieces- 6"
3 pieces - 5"
2 pieces - 4"
1 piece - 1.5"

STEP TWO
Fold the ribbon in half to find the middle.
Then, create a figure 8 shape by looping each end toward the middle
and securing with a dot of hot glue.
With the shortest piece, create a cute little ring/circle.

STEP THREE
Layer the three long pieces into a flower shape - securing each layer with hot glue.

STEP FOUR
Take the 5" pieces and layer them on top of the three longest pieces in the same manner.

STEP FIVE
Criss-cross the smaller pieces and layer them on top the pile of sparkly happiness.

STEP SIX
Finally, add the little loop to the middle of the bunch.
And VOILA! You have a gorgeous sparkly holiday bow that will
make your outfit fabulously festive!

If you want to secure the sparkly hair bows to an alligator clip, then first cover
the clip with a almost 4" piece of the same ribbon. 
When I cover an alligator clip, I start on the underside of the clip and glue as I go,
until I wrap around into the inside of clip.

See! 
A perfect little sparkle alligator clip to secure your gift bow hair pretties to!
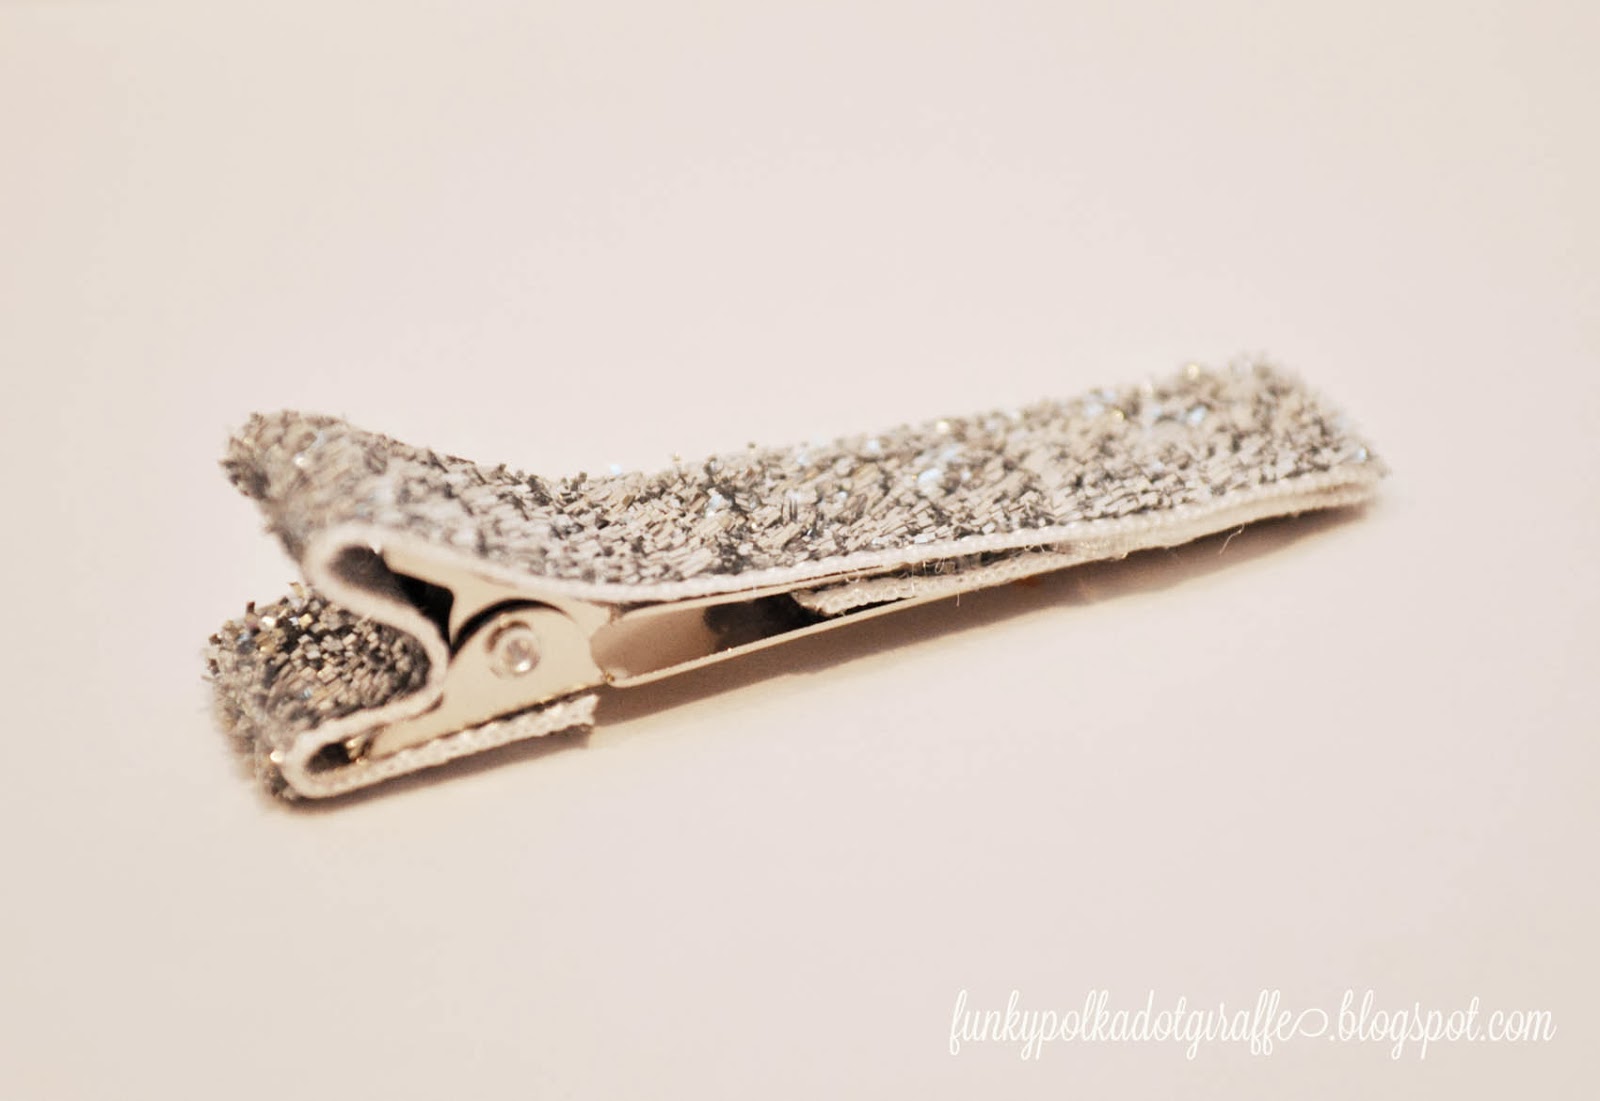
Glue the ribbon gift bows to the alligator clip and they are ready to add a little
jazz to your fabulously festive holiday attire.
They are perfect for piggy tails, double messy buns (my fave!), or secured
together at the top of a big messy bun or regular bun.

I hope this helps make your holidays more festive and sparkly!
Then, my mission will be accomplished :)


Monday, November 25, 2013

{DIY} Thanksgiving Embroidered Napkin Rings #turkeytablescapes

turkeytablescapes
This post is brought to you by Jo-Ann Fabric and Craft Stores. I was given a gift card to facilitate 
making a #turkeytablescapes craft.

Thanksgiving is such a fun time of year and I love making and creating things
to decorate the house with to celebrate the season.
I think it's so fun to create a festive tablescape that gives your dining area
an extra OOMPH and brings together a lot of different mediums - fabric, wood, wire, etc.
The wire pumpkin below is something I made last year from craft wire I got at my local Jo-Ann.


This year I wanted to make napkin rings for my Fall table.
We usually have Thanksgiving dinner at my in-laws' home, so I don't have to set
a table for the big day, but I thought the kids would still like to have a special
dinner and these cute little embroidered felties made the perfect accent to the table.

#turkeytablescapes

I grabbed some felt from the remnants section at my Jo-Ann Store (one of my favorite spots!),
and used my Brother embroidery machine to sew up these cute little turkey themed felties.
Then, I tied up the napkins with some cute baker's twine and clipped the little felties
to the twine to create adorable napkin rings.

Thanksgiving tablescape

They turned out so cute and since the felties are on mini clothespins , I can use them for other Fall
decor in the house when they aren't being used as napkin ring faces.


So when decorating for Thanksgiving - or any holiday - don't forget to spruce
up that dining table and make it festive space for the season!

#turkeytablescapes


Sunday, October 27, 2013

{Sparkly} Framed Skull Art #spookyspaces


glitter skull
This post is brought to you by Jo-Ann Fabric and Craft Stores. I was given a gift card to facilitate 
making a #spookyspaces craft.

I love to decorate for Halloween, and every year I like to make something new to
add to my growing collection of decorations.
Last year I made these simple embroidered frames which I did as a craft for
the Pinterest Party I hosted. They are one of my most favorite Halloween decor items
because they are simple and easy to store.

One problem with living in a small space is that I am rapidly running out of
space to store any more Halloween decor. So, I've started getting creative
and making some of my everyday decor items a little bit spooky for the season.
One easy way to do this to use frames that normally hold pictures of my kids
and changing them up a bit. Sometimes I just add a printable, but this time I wanted
to try something a little bit crafty.

So I grabbed these Tulip Fashion Glitter Transfer Sheets, some of my favorite
black fabric from Jo-Ann, and my Silhouette machine and got to work.
These glitter transfer sheets are so fun! You can put designs on any iron worthy surface.
I've used them on t-shirts, onesies and now something for a picture frame!

I cut a piece of black fabric that was slightly larger than the glass in my frame.
My frame is 8x10 this time, so I cut a piece that was 10x12 to give me an inch all around
for temporarily mounting the fabric to the piece of glass.

I picked a relatively simple design for my Silhouette machine to cut.
I wanted something that would be easy for you to cut if you had to do it by hand.
If you decide to cut with a personal cutting machine like a Silhouette or Cricket,
then I will tell you that I set my blade to 10 and selected "flocked heat transfer material".
I probably didn't need a 10 like I did with the other Tulip glitter sheets,
but it worked well and cut the sheet just fine.

I did a test run with a gold sheet to make sure it would cut correctly and
to make sure that I had the sizing right to fit nicely in my 8x10 frame.


Then I cut my silver skull and it turned out perfectly!

Following the directions on the package I ironed the glittery skull onto my fabric.
You can see why I love this black fabric - it has a light textured pattern that is just
so much cooler than a regular black cotton fabric.


Next, since I only want this to be a temporary resident in my frame,
I used some tape to hold the new piece of art in place directly on the piece of glass.
If you want to make it permanent, I always just hot glue the fabric
directly to the glass - like I did with these embroidered holiday frames.


Here he is! My sparkly Halloween skull that adds a little spooky to my regular
old frame and bookcase. Plus, things that glitter are even cooler than un-glittery things!


I added a googly eyed spider and a LED candle I picked up on after-Halloween clearance.
And now I have the perfect little spooky space that can easily convert back to regular
decor once the holidays are over in January!


Here's a 50% off coupon for you to use at Jo-Ann, so you can
add a little spooky to your spaces!

joann 50 off coupon


Thursday, September 5, 2013

Pretty Baby Bibs: {Waverize} It!


Disclosure: This is not a sponsored post. I was given the Waverly fabric by Joann for review purposes.

 Woohoo! It's National Sewing Month - so it's time to get out some fantastic fabric and sew!
And to help motivate you and to celebrate Waverly Fabric's 90th Anniversary,
Joann and Waverly are teaming up to bring you the Waverize It! Facebook contest.
This contest is open to everyone! Holla!
To enter, between September 1-22 sew up your own fantastic creation with 
beautiful Waverly fabric and then enter yourself for the chance to win 
$1000 in Waverly fabric and a $250 Joann gift card. 
You can find out more about the contest by visiting the Waverize It! contest page.


To kick off the celebration, I received some beautiful Waverly fabric so that I
could Waverize something in my home. My little baby niece Pollyanna needed
some super soft and adorable bibs to keep her drooly little habit at bay.
So my sister sent me some bamboo organic cotton towels and asked me to pair
it with a pretty, soft fabric for the front side.


When I opened my surprise package of Waverly fabric and found this gorgeous
floral home decor loveliness staring back at me, I knew it would be perfect for the bibs.
I had my sister scan in a bib that fit my niece, I printed it off and used it as
a template to create my pattern for the new bibs.
Then, while watching some good old Jeff Lewis: Interior Therapy one evening,
I set to cutting out a bunch of pretty bibs.


The fabric is fantastic and paired well with the bamboo cotton towels.
It washed up nicely and my niece will soon be sporting some gorgeous bibs
in her new homeland of Korea - making all the babies jealous.


So if you love to sew and want to win A LOT of fabulous Waverly fabric
and some moola to spend at Joann, then be sure to head over to the


ShareThis

Related Posts with Thumbnails